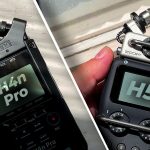
In this review, we’re going to compare three handy recorders, the Zoom H4n Pro, the Zoom H5, and the Zoom H6. We’ll have a look at what each recorder can do well, what it can’t do, and who should buy it.
Let’s begin.

Inputs
To start off with, let’s have a look at the number, and type of inputs each recorder has. To put it simply, this refers to the number of external microphones, or instruments, which you can connect to these recorders.
This is different to the Zoom capsules, which are different, but don’t worry, we’ll go into detail on the capsules later on in the review.
So the Zoom H4n Pro and H5 each have 2 x XLR/TRS inputs, the Zoom H6 has 4 x XLR/TRS inputs, and they each have a 3.5mm mini-jack input. Kind of. So the H4n Pro has a built-in 3.5mm input at the back of the recorder.
The H5 and H6 have their 3.5mm input in the default X/Y capsules that they come with. Not all the capsules have the 3.5mm input, so bear in mind that if you use a non-default one, that input will not be accessible.
The most obvious use for the 3.5mm input is if you want to plug in a lav mic. If the mic also needs plug-in power, all three devices can provide it.
XLR/TRS
Now, back to the XLR/TRS inputs. Basically, these inputs are for larger microphones, such as the Shure SM7B, which is a dynamic mic, and is often used for either podcasts, or general voice recording. They can also take shotgun microphones, which are highly directional, and are usually used to either record sound effects, instruments, or dialogue.
The benefit of using such a microphone is that it mostly records what’s in front of it, and largely ignores sounds coming from the back, or the sides.
As it happens, I actually use the Shure SM7B in my current recording setup. If you want to check out the setup in its entirety, I have a link down below where you can see everything.
How Many?
So, to wrap up on XLR inputs, how many do you need? If you intend on using your recorder as it is, and just run around and record sound effects, ambiences, music, etc. then all you need is the H4n Pro.
If you want to do some recording which involves two microphones being connected, such as when recording interviews, instruments, or sound effects from multiple perspectives, the Zoom H5 would be better.
In fact, I would almost argue that for most people, there’s almost no point in buying the H4n Pro, and they should just graduate to the H5, but stick around until the end of the review to find out why.
Finally, if you need multiple inputs, like in the case of a podcast, The Zoom H6 is your choice.
If you actually want to connect more than 4 microphones, there is actually a solution for that, and we’re going to address it in a bit.
Battery Life
How well do these devices fare when it comes to battery life? According to Zoom, the H4n Pro is rated for 6 hours, the H5 is rated for 15 hours, and the H6 is rated for 20 hours.
These estimates are hard to test, and they usually involve perfectly ideal scenarios. How much recording time you actually get depends on a multitude of factors, such as battery type and brand, how many microphones you have connected, what file format are you recording in, are you using Phantom Power, what is the air temperature, and more.
The reality of the situation is that when on the ground, recording, you should just have a bunch of spare batteries with you. In my personal testing, I’ve left the Zoom H6 recording all night, and 8-9 hours later, it was still going strong.
There aren’t many instances where you’d need more than that, unless you are recording really long ambiences.
These types of recorders also work with power banks, so that’s an option too, or alternatively, you can purchase their accessory packs, which contain adaptors and charging cables.
This would allow you to just keep them plugged in, and record indefinitely, or at least until the SD card is full.
If you do want to check out those accessory packs, I’ve got affiliate links down below for each, if you want to check them out.
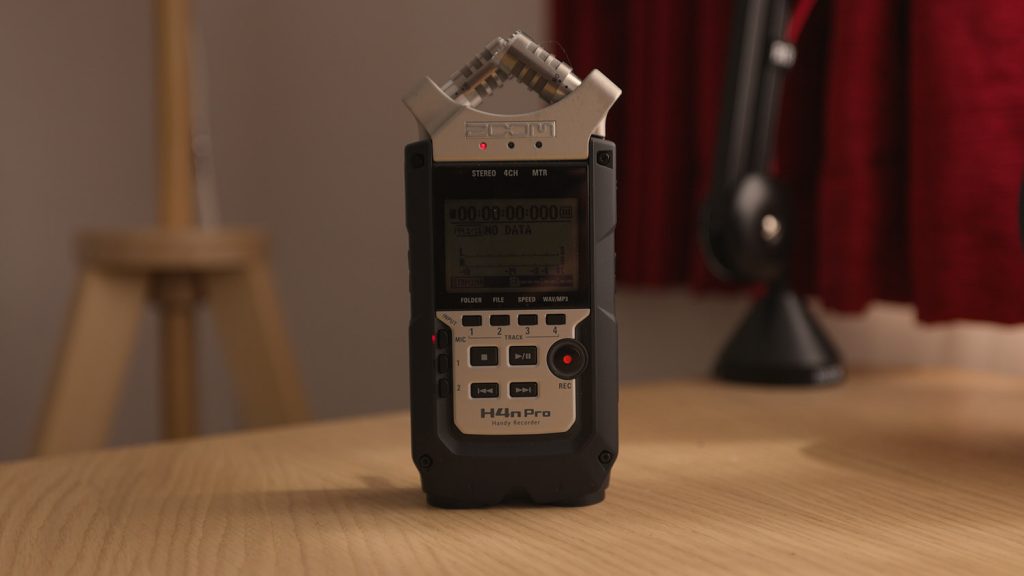
Size & Build
In terms of build quality, all three are quite nice, though I’d say that the nicest one is the H6, followed by the H5, which is then followed by the H4n Pro.
This is to be expected, given the price point.
There is one known issue that I have to draw your attention to by the way, which has to do with the rubberised coating on these recorders. After a few years of use, some of these devices can become sticky to the touch.
There are ways to fix this issue, if it arises, though I’m not going to recommend any of them, as there is a risk that you can damage your device when cleaning it. You’ll have to look this up for yourself.
It’s also important to note that the issue with the sticky rubberised coating isn’t unique to Zoom, and it tends to happen to devices which have a similar coating.
In terms of size, let’s take them one by one.
The H4n Pro measures 73 x 157.2 x 37mm, or 2.87 x 6.19 x 1.46 inches, and weighs in at around 294g, 10.37 oz.
Next up, the H5 measures around 197.3 x 66.8 x 42.16mm, or 7.77 x 2.63 x 1.66 inches, and weighs in at around 269 grams, or 9.52 oz.
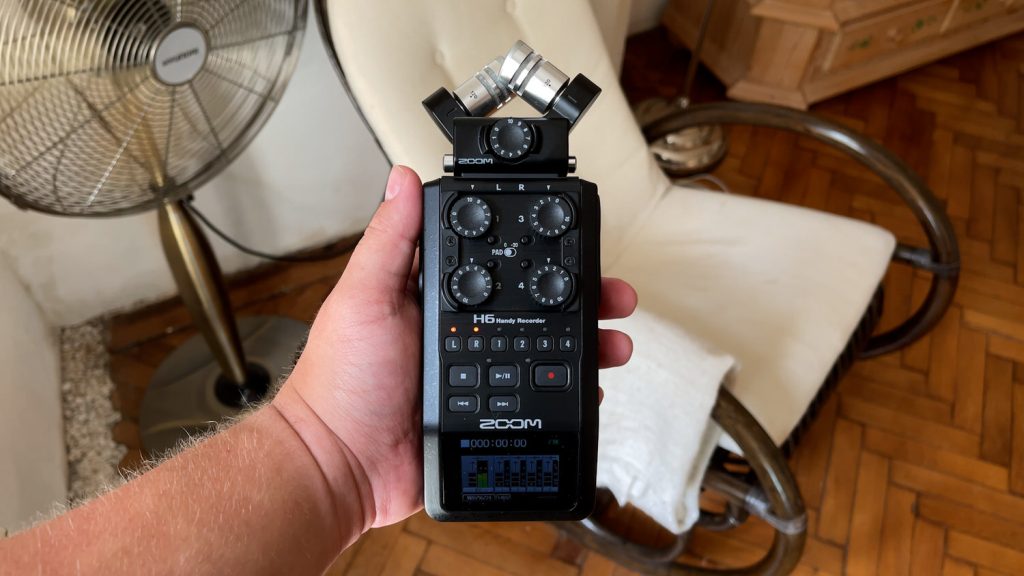
Finally, the Zoom H6 measures around 77.8mm x 152.8mm x 47.8mm, or 3.06 x 6.02 x 1.88 inches, and weighs in at around 280g, or 9.88 oz.
Display
When it comes to display, all three have backlit displays, but the one on the H6 is in colour. The fact that you can illuminate the screen is fantastic when trying to record in low-light conditions.
The H6 obviously has the nicer quality screen, and it’s also tilted, which is an improvement over the level screens of the H4n Pro, and H5.
Versatility
Now, let’s talk about how versatile these recording devices are. Which one is useful in the highest number of meaningful scenarios?
Well, the H4n Pro has the fewest inputs, and it also can’t use any capsules, so it goes last. The H5 and H6 are the only ones left in the race.
They can both use capsules, which makes them incredibly versatile, but the Zoom H6 has the most inputs. Given that you can connect 4 microphones or instruments to it by default, this definitely makes it the most versatile.
Since we’ve breached the topic of capsules, let’s actually talk about them.
Capsules
So, we know that the H4n Pro can not use any capsules, just the built-in ones. The H5 and H6 can use quite a few of them, each being easy to mount and unmount.
Let’s delve deeper into each capsule, and see how they can be useful to us.
EXH-6 Combo Input Capsule
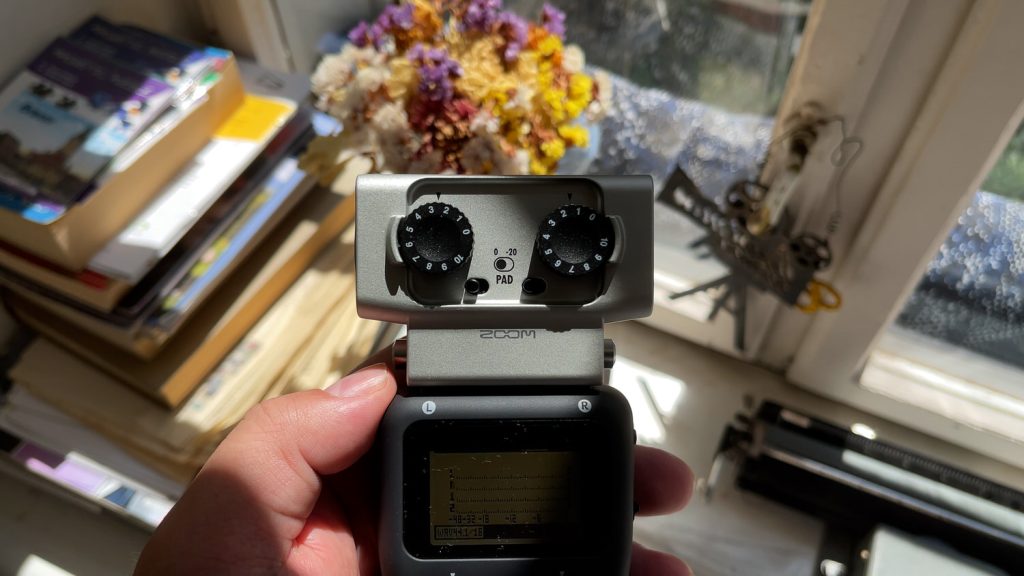
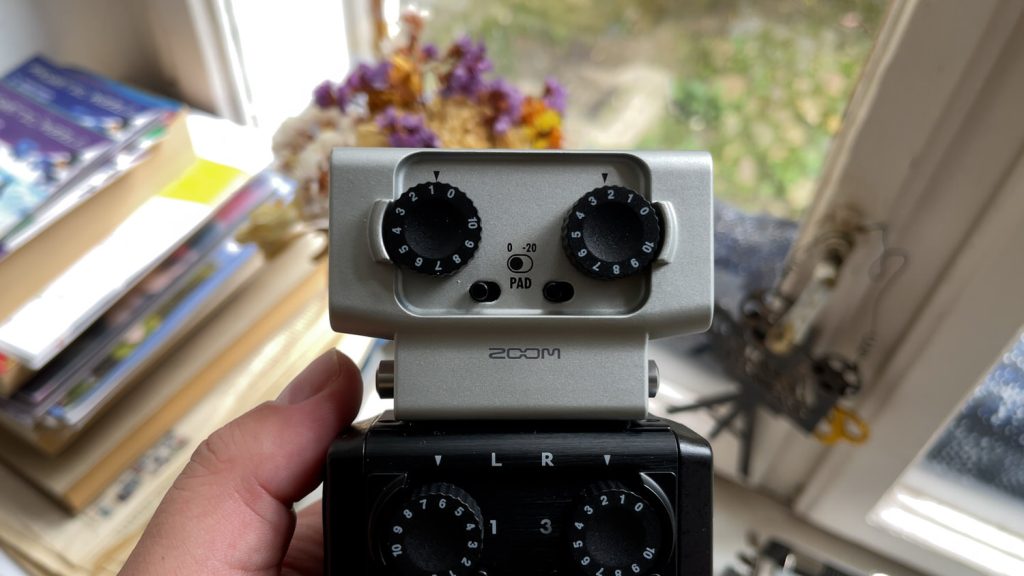
So the EXH-6 enables you to connect two more XLR microphones to your recorder, thus upping the total number of inputs of the Zoom H5 from two, to four, and in the case of the H6, from four, to six.
This is incredibly useful in many scenarios, such as field recording, sound effects recording, instrument recording, if you want to get multiple perspectives, and of course, podcasts.
This capsule does have a limitation which you need to be aware of though, which is that it can not provide Phantom Power to the microphones connected to it. The built-in inputs can, but the capsule cannot.
This may, or may not be a problem, depending on which microphones you use. Most condenser microphones need Phantom Power, whilst dynamic microphones do not.
I’d recommend looking up which microphones you plan on using, and checking if they need the extra power or not.
XYH-6 Capsule
Next up, the XYH-6. So this is the capsule which comes by default with the Zoom H6 and H8. It adds two matched unidirectional microphones to your recorder. When it comes to pickup pattern, this capsule is most sensitive to sound coming from in front of it, and it is less sensitive to sounds coming from the sides, or from behind.
This is more of a general-use capsule, as it’s good for most things, including general recording, ambiences, sound effects, live gigs, and more.
If you’re thinking of getting the H5, I would actually recommend you keep the default one that you get with it. Here’s why.
XYH-5 Shock Mount Capsule
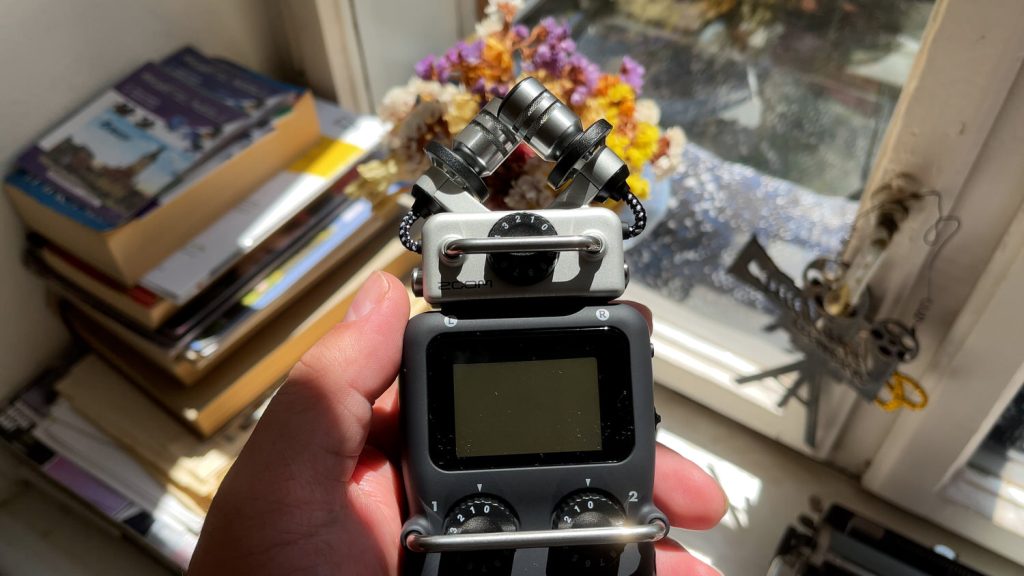
The name of this capsule makes it apparent that it contains a shock mount. The XYH-5, which is the default capsule that you get with the Zoom H5, has a built-in shock mount.
The purpose of this feature is to minimise vibration and handling noise when holding the recorder in your hand.
I’m confused as to why the XYH-6 capsule doesn’t have a built-in shock mount as well.

MSH-6 Capsule
Next up, one of the more obscure capsules is the MSH-6. The MS in its name stands for Mid-Side, which means that after you’ve made your recording, you are able to adjust the width of the stereo image.
This will come in handy in a range of scenarios, from ambiences, to recording instruments, and more.

SSH-6 Mid-Side Stereo Shotgun Microphone Capsule
Even stranger than the MSH-6 is the SSH-6 capsule. So, this capsule contains a super-directional microphone, which has been designed to focus on sound coming from in front of it, as well as a bidirectional side mic, which picks up sounds left and right of it.
The obvious use for this mic is to record dialogue, which you can capture on set, and then in post, you can decide how much ambient sound you want to mix in.
SGH-6 Shotgun Microphone Capsule
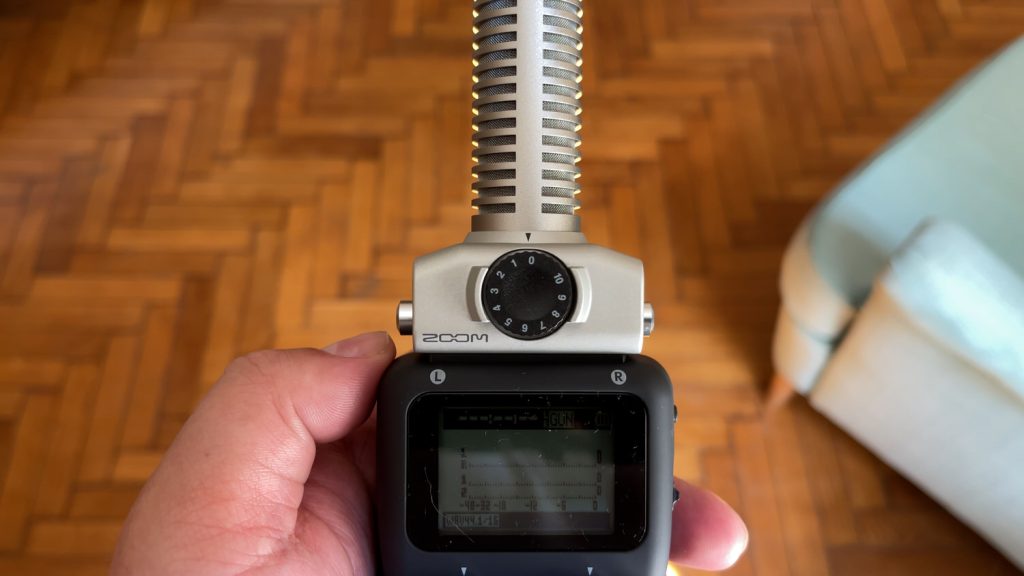
Next up, one of my favourite capsules, the SGH-6. This capsule captures a mono signal, and its super-directional nature helps isolate whatever it is you want to record.
It’s basically designed to focus on one thing, and capture it well, whilst generally ignoring sounds coming from the sides, or the back.
If the XYH-5 and XYH-6 are flashlights, the SGH-6 is a laser.
The reason why this has become one of my favourite capsules, is that I’ve used it many times to record audio for this channel. Once we finish talking about capsules, I’ll tell you a bit more about how I achieved that, and more importantly, why I chose this capsule.
More capsules
So, these are the capsules which are compatible with the Zoom H5 and H6, but Zoom has 3 more, which are compatible with the Zoom H8. I believe it’s important that you know what they do, as this might end up impacting your purchasing decision in a major way.
By the way, I’ve also reviewed the Zoom H8 on my YouTube channel.
XAH-8 Capsule
So the first H8 capsule we’re going to look at is the XAH-8, which is actually similar to the XYH-6, except that it’s an XY/AB combination mic. This capsule allows you to record either in a wide AB pattern, or with a tighter XY pattern. You’ll want to change from one mode to another, depending on what you intend to record.
Ambiences usually call for the wider option, while sound effects, if you choose to record them with this capsule, would usually benefit from the narrower option.
VRH-8 Capsule
The second H8-only capsule, and perhaps the more exotic one on the list, is the VRH-8, which is an ambisonic mic capsule.
This mic has a built-in accelerometer, which ensures that the capsule is always perfectly aligned. Also, the onboard Ambisonic decoder handles any necessary conversions, so that you save time in post-production.
EXH-8 Capsule
And finally, the third capsule, called the EXH-8. This one I think is, from a technological perspective, the most impressive, as it is a significantly upgraded version of the EXH-6.
The EXH-8 not only gives you four extra inputs, in addition to the H8’s six built-in inputs, but if you’re willing to connect it to a power source, it will also deliver Phantom Power to the extra mics.
If you choose to do that, the setup obviously becomes a lot less portable, but the most popular use for this capsule would be in a podcast scenario, where you wouldn’t be moving the recorder anyway.
Voice Overs
Now that we’ve covered all the capsules that the Zoom H5 and H6 can use, let’s go into a bit more detail about how I utilised the SGH-6 capsule to record voiceovers for this channel.
So I’ve spent some time travelling, and I required a setup that was both mobile, and effective. I ended up deciding on the Zoom H6, with the SGH-6 capsule.
When it was time to record, I’d place the recorder on a small desk stand, I’d point the mic in the general direction of my mouth, and I’d record.
Usually, it was a bit to the side, instead of pointing directly at my mouth, in order to minimise plosives. When speaking directly into the mic, certain sounds, like Ps, expel air, which hits the microphone, and creates a low, unpleasant sound.
Now, because I was travelling, and sleeping in different locations, it was difficult to measure the acoustic properties of a room, before renting it. Not just that, but it’s difficult to predict just how noisy the traffic will be at different times of the day, or how loud your neighbours are.
Because of that, I needed a mic that would mostly focus on my voice, and overall block out sounds coming from around, or behind it. That’s why I picked the SGH-6. I could have also gone with the SSH-6, but that would have been overkill, given my needs.
This would have worked just as well with the H5, but I prefer the shape and feel of the H6 more, which is why I went with it.
By the way, I’ve reviewed more handheld recorders on my YouTube channel. I’ll also start reviewing Tascam recorders soon.
-12dB Backup
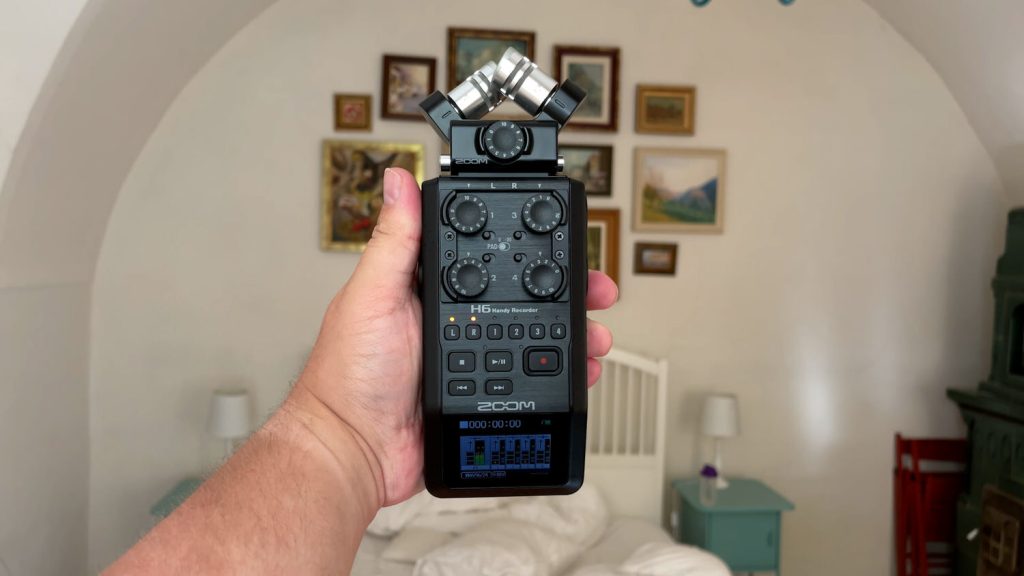
Next up, let’s talk about a very useful feature which the H5 and H6 both have, but unfortunately, the H4n Pro does not have. This is the -12dB Backup feature.
So what it does, is when you’re recording, it captures a backup track, precisely -12dB quieter.
The reason you might want this, is in case your recording clips, and thus a portion of it, or the whole thing, becomes unusable.
Now, even though this feature sounds fantastic, and it is indeed, it, unfortunately, has a flaw. When I first noticed this feature, I had assumed that it would work for any capsule, or external mic that I choose to plug into my recorder.
Unfortunately, it only seems to apply to the Left and Right channels, when you record with the X/Y capsule.
You can’t use this feature for microphones or instruments plugged into the XLR/TRS inputs.
This feature is a bit confusing, as I’ve seen a lot of conflicting information online about it. Some claim that they’ve managed to get it to work with XLR mics, while others say that it wouldn’t work with that.
If you know how to make it work with external mics, leave a comment down below.
Setting Levels
Now, whether you have access to a backup function or not, it’s crucial that you know how to set levels, so that the backup feature can help you, without you having to rely on it.
Generally speaking, you want to set your gain in such a way that the loudest sound you’re likely to make, or record, will peak just under 0dB.
By doing this, you won’t clip, whilst at the same time, you won’t be recording at such a low level that hiss will be introduced into your recording.
In reality, this isn’t achievable, but there are some things that you can do. What you basically want to do is set your levels in such a way that you have some headroom, which should insure you against clipping.
When looking at the screen, make, or record a loud sound, as loud as you’re likely to record that session. This should hit around -6dB. Normal sounds will sit somewhere around -12dB, and quieter sounds will probably hit somewhere around -20dB or so.
The number that you set is up to you, as different scenarios require slightly different settings, and a different amount of headroom. If you expect that you’ll be shouting during the recording, or you’ll record loud sounds, such as explosions, you’ll need enough headroom, so that your recordings won’t become unusable.
If, for example, you’re recording guitar, hit a palm muted power chord as hard as you’re likely to do during recording. That’s about one of the loudest sounds your guitar can produce. If that doesn’t clip, nothing else is likely to, at least as far as sounds that a guitar can produce.
Figuring out levels will take a bit of practice to get just right, but it’s something that is worth mastering.
Sample Rate, Bit Depth, and File Type
Before we actually start talking about sample rates, bit depth, and file types, let’s quickly define each, so that you understand what they mean. Once you’ve understood them, I’ll explain what each is useful for, so that you can decide if either of these recording devices is enough for you.
When it comes to sample rate, you can pick between 16 and 24-bit. Because large SD cards are now affordable, just stick with 24-bit rate when recording. There’s no real reason to go down to 16-bit anymore.
When considering file type, you should just use .WAV. It might feel convenient to use .MP3, as it will take up a lot less space, but unfortunately, .MP3 selectively degrades the quality of your audio, in the interest of file size.
This might not be as noticeable with music, when listening on consumer-grade headphones, but when you’re manipulating those sounds in post-production, you’ll have a lot less room to manoeuvre.
MP3
The only real use for .MP3 is if you want to use your recorder as a dictaphone, which I’d imagine is no longer a popular use for them, since everyone has smartphones. Plus, there are way smaller and cheaper handheld recorders out there which can serve as dictaphones.
In terms of sample rate, there are a few alternatives, and each serves a different purpose. There’s no need to actually go into the science of it, but you can think of sample rate like frames per second, when shooting video.
Frame Rate
Frame rates such as 24fps and 30fps record basically just enough video information to trick your eye into perceiving the motion within it, as fluid. As it turns out, the human eye needs 24 different frames to be played within a second, for the motion to not look unnatural, or choppy.
You can go way higher than 24fps, but the only real purpose of that is to then force your computer to play the footage back at 24fps, thus achieving slow motion.
If you have a second of 120fps video, forcing the footage to play 120 frames at a rate of 24fps means that the footage will play out over 5 seconds.
Your choice of sample rate should follow a similar logic, as recording at higher sample rates allow you to stretch the audio further, without getting weird artefacts.
Now, let’s talk about each sample rate that you’ll have access to, and discuss what they’re intended for.
44.1kHz
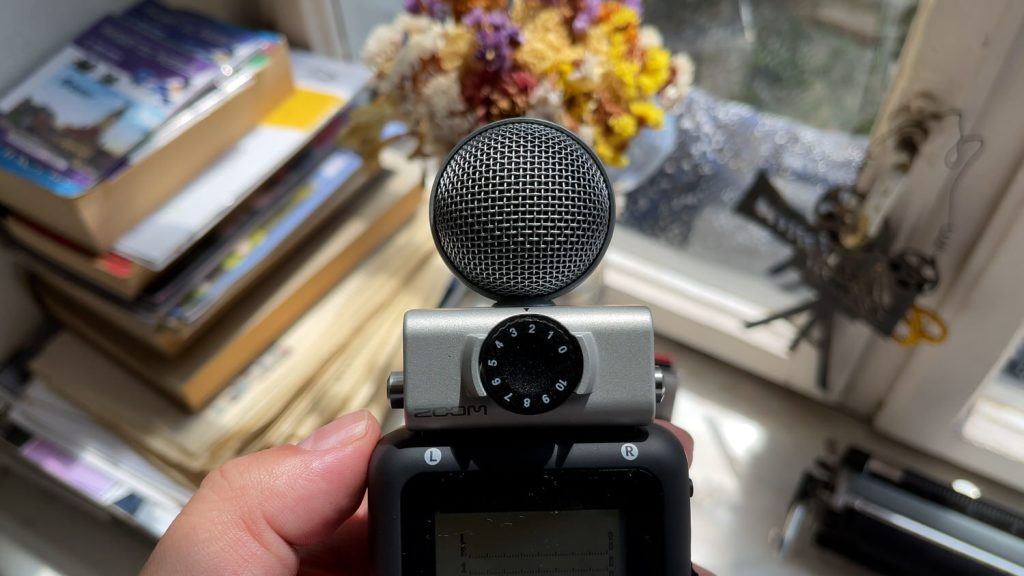
This is the minimum sample rate that you’re likely to use, and it’s usually intended for music. There’s nothing stopping you from recording your music at a higher sample rate, and there are instances where that would be appropriate, but generally, 44.1kHz is where you’ll be at.
I’ll explain in a bit why you would want to record your music at 96kHz, or even higher.
48kHz
This sample rate is normally used when you need to play audio alongside video. This applies to dialogue, or voice-over for video. When I used to work as a sound designer for film, 48kHz is what I had to work with all the time.
96kHz
Finally, this sample rate is usually reserved for more specialised use cases, such as recording ambiences, or sound effects which you intend to heavily stretch, or process.
Recording at this higher sample rate allows you to manipulate sound to a higher degree, which is why most sound effects are now recorded at 96kHz, or even higher.
The reason why you’d want to record music at this sample rate is if you want to be able to heavily process your recordings, especially if you want to play with timing and stretching.
Also, all of my sound effects libraries are recorded at this sample rate. I’ve released a few over the years, and I’m actually doing a sale that will last until the end of the year.
If you want to check them out, I have a link down below. Wink wink.
Also, to clarify, all three devices can record at up to 24bit/96kHz, so this section applies to all three.
Audio Interface
Can you use the Zoom H4n Pro, H5, or H6 as an audio interface? The answer is yes for all of them. All that you have to do is open the Menu, select USB, and then pick Audio Interface.
Free Sound Effects
By the way, did you know I have compiled the largest list of free sound effects in the world? Over 500GB of sounds, ready to be downloaded, free of charge. Just figured you’d want to know. And now, back to the review.
Sound Quality
Now, what about sound quality? So the Zoom H4n Pro, H5, and H6 all basically have the same preamps, which basically means that they sound the same. They are all suitable to record voice, concerts, music, sound effects, instruments, and basically pretty much anything that you could think of.
Capsules
Bear in mind that different capsules are suited for different things. You can use any capsule to record your voice for example, but the SGH-6 is going to do a better job than the XYH-6 for example, as the SGH-6 will focus on your voice, while the XYH-6 will also capture a lot of the reverberations in the room, along with any other noises present.
There are instances when capturing the feel of the room is desirable, but for voice-over, 99.9% of the time you want your voice to be as isolated as possible. The other 0.1% of the time is when your weird indie friend comes over, and really likes the reverberation in the room. Shoutout to my friend, William.
So, even though these devices are super useful, there is one area in which they do not excel, and that is when they need to record super quiet stuff. Normally, this means either really quiet natural ambiences, or ASMR.
So, as a byproduct of how the internal components of these devices work, there’s a certain amount of hiss that is produced. All recording devices produce this hiss.
When you increase the gain on your recorder, you’re also increasing the amount of hiss. What you want, is a good sound-to-noise ratio.
Sound-to-noise Ratio
Sound is the stuff that you want, and noise is the stuff that you don’t want. In other words, when you’re recording something loud up close, like a guitar, or drums, the wanted sound will completely overpower the unwanted noise. As a result, you’ll have your gain set lower on your device, and the desired sound will be so loud, that the hiss will not be audible, even though it’s actually still there.
That’s what a good sound-to-noise ratio is.
When what you want to record is super quiet, you’ll want to pump the gain up on your recorder, and because what you want to capture is so quiet, it’ll have a harder time masking the hiss produced by the device.
The only real option if you want to record super quiet stuff with a handheld recorder, is to get a Sony PCM-D100. I’ve actually reviewed this device on my YouTube channel.
Quiet Recordings
This device is not perfect by the way, it still produces hiss, just like any other recording device, but it produces less of it, which means that you can record quieter stuff with it, compared to other handheld recorders.
The downside of the Sony PCM-D100 is the price. It was always rather pricey, but as it is difficult to source at the moment, the price has gone up dramatically over the past few years.
I have an affiliate link down below, if you want to check out how much it currently costs in your country.
There’s actually debate online as to the current status of this device. Some say that it’s discontinued, so you can only buy it second-hand, some say that it’s still produced, but in lower numbers, and others say that production is on pause, due to sourcing components being more difficult at the moment.
Nobody seems to agree on its status, but everyone agrees that it’s the best, and that you’ll have to pay up if you want to get it.
Actually, here are 30 seconds of natural ambience from one of my libraries, recorded with this device. Please bear in mind that the price you see on the screen might change in the future.
Wind Protection
So, in the process of recording outdoors, you’ll often find yourself battling wind noise. This can occur if you’re doing field recording, if you’re recording an interview outside, or perhaps capturing an outdoor music performance.
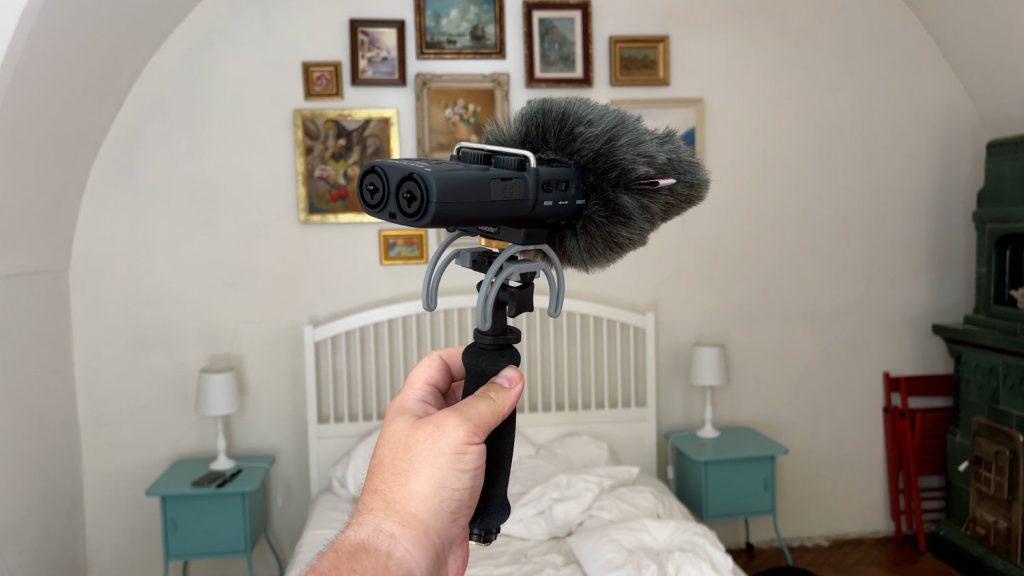
Most recorders come with a little foam windshield, but unfortunately, it’s basically useless. The best thing to do is invest in a proper windshield, unless you want to travel all the way to your location, only to find that everything you record is unusable due to wind.
I normally recommend this kit from Rycote, which offers you a quality windshield, a grip, and a shock mount. The grip and shock mount allow you to hold the recorder in your hand, without getting handling noise in your recordings.
If you choose to record with the device in your hand, without a shock mount, any tiny movement, or change of grip strength, will cause unwanted noise.
Also, bear in mind that really strong wind can be tricky, and there is a limit to how much a furry windshield will actually help you. Mild wind will be fine. Stormy conditions might be a problem.
This is difficult to measure, as you’d have to account for wind speed, your exact geographical location, the geography surrounding the recorder, the angle at which the wind is hitting the mics, etc.
Portability
Now, a very important aspect of handheld recorders is portability. After all, that’s one of their perks; the ability to just throw them in your backpack, and head out the door.
If I had to choose based on portability alone, I’d actually pick the H4n Pro. Even though the H5 and H6 can use an assortment of different capsules, some of these attachments can significantly elongate the device, thus making it a bit more awkward to carry.
If you just want to use the default X/Y capsule, and you just want something to pull out of your bag and start recording, the H4n Pro would be the logical choice.
Guitar Effects
Do any of these recorders offer guitar effects? Surprisingly, only the H4n Pro does. All three recorders have built-in tuners though.
The guitar effects are not something which I’ve personally ever used, as I prefer recording clean guitar tracks, and then adding effects in post-production, but I know this feature is something a lot of guitarists might be interested in.
Affordability
What about affordability? While prices do fluctuate, as you might expect, the H4n Pro is the cheaper option, while the H6 is the most expensive out of the three.
Ease of use
What about ease of use? How easy are these recording devices to use?
My personal experience suggests that all three of these devices have intuitive menus, which is a great plus. When it comes to physicality, the H5 and H6 are easier to use, as they have physical gain wheels, as opposed to the H4n Pro, where changing the gain requires you to push a button on the side of it.
The physical wheels on the H5 and H6 allow you to change levels during recording, without introducing unwanted handling noise. Between these two though, I actually prefer the gain wheels on the H5, as it has a physical bar in the way, which makes it less likely that you’ll accidentally change something during recording.
The H6 kind of has some plastic guards in place, but it’s not quite the same thing.
Storage
So, when I was initially researching the H4n Pro, I came across a rather interesting fact. The H4n Pro actually has built-in memory.
Kind of.
There is a feature which allows you to record up to 35 seconds of audio, which is transferrable to an SD card.
This is presumably aimed at people who want to record a quick memo, or a musical idea, but don’t have an SD card inside of their device at the time.
This feature was clearly designed before everyone had a smartphone, but still, it’s an interesting feature nonetheless.
In terms of actual storage, the H4n Pro and H5 can take SD cards of up to 32GB, while the H6 can take cards up to a whopping 128GB.
Is It Sufficient?
Even if you’re recording at 24bit/96kHz, 32 GB is a lot of space to work with. If you’re recording a track in stereo, at 24bit/48kHz, 32GB should in theory allow you to record for up to 2000 minutes, or 33 hours. In the case of a 128GB card, that’s literally 4 times longer, so 8000 minutes, or 132 hours.
None of these recorders can last anywhere near that long on battery power alone, so you’d have to plug them in if you want to record that long.
Before we move on, I need to point out an issue with the H4n Pro. The larger the capacity of the SD card is, the longer it takes the H4n Pro to boot up.
With a 32GB card, it can take up to a minute for the H4n Pro to boot up. With that in mind, there is a trick you can use, which is formatting your SD card inside of the recorder, as opposed to doing it on your computer.
If you do this, it will reduce the boot time. If you want a quick boot time though, you’ll have to use a smaller SD card. This is not an issue with the H5, or H6.
Conclusion
In conclusion, which one should you buy?
Congrats on still being here by the way. This is definitely the longest video I’ve done to date. If you’ve made it this far, comment ‘still here’ down below.
So, let’s consider each recorder.
The H4n Pro is affordable, portable, and easy to use. You can just whip it out of your backpack, and start recording, unless you have a large SD card, in which case you’ll have to wait for it to actually boot up. If you don’t need the extra capsules that come with the other devices, and you won’t ever need to plug in more than two microphones, this device is the way to go.
If you want all the perks above, capsules, two inputs, and no issues with long bootups, the H5 is definitely a better choice. In fact, I’d almost say that there’s no real need to buy the H4n Pro, and you should just have a look at this one instead.
Why? Well, the H5 is more expensive, but usually not by that much. If you don’t need the guitar effects that the H4n Pro has, I’d say you should just go with this one instead.
Maybe you’ll buy some capsules in the future, or maybe you won’t, but having the option to use them sure is nice.
Enough?
If the number of inputs provided by either of these two recorders is not enough though, you’ll want to have a look at the H6 instead. You get 4 built-in inputs, all the features that the other recorders have, minus the guitar effects, and of course, you have the use of a myriad of capsules.
Now, if four native XLR inputs are not enough still, you can actually have a look at the Zoom H8. I’ve reviewed it on my YouTube channel.
If you’d like to purchase any of the items I’ve mentioned in this article, or see how much they cost in your country, I have a link down below where you can view them.
Thank you for reading my comparison review of the Zoom H4n Pro, H5 and H6. I invite you to have a look at some of my other articles. We have something for everyone, whether you’re interested in audio, or cameras and lenses. Alternatively, if you prefer video reviews, feel free to have a look at my YouTube channel.
Product Links
Down below you will find all of the items I talked about in this article.
