Considering purchasing the Zoom H6 All Black, but you want to know if it suits your needs before you do so? After posting my initial review of the Zoom H6 Grey a couple of years back, and interacting with the hundreds of comments and questions, I’ve compiled a new, more complete review.
A few years back I purchased my first Zoom H6. Even though it was specifically purchased in order to record sound effects, after using it for a while, it quickly became clear what a versatile device the H6 really is. Not only could I use it to record sound effects, but also everything from podcasts and voice over work, to dialogue and live music.

Differences
First off, I’m going to address what the actual differences are between the older Zoom H6 Grey, and the newer, All Black edition. After that, we’ll delve deep into what makes the Zoom H6 such a nifty little device, and even if you’re familiar with the recorder, you might just learn something new.
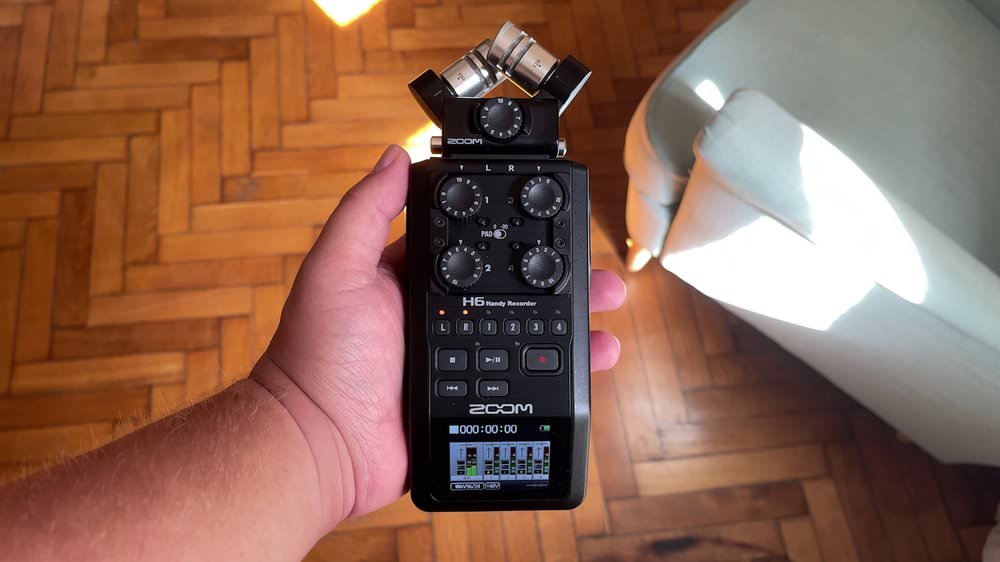
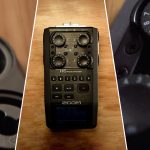
On a superficial level, the main difference is the colour of the device itself, and of the X/Y capsule.
When it comes to what you get in the box, the All Black edition actually gives you fewer things. For example, the older Zoom H6 included a plastic carry case, with a handle, and room for the recorder, X/Y, and MS capsule. In the new edition, you no longer get the carry case, and you don’t get an MS capsule either.
In terms of the insides of the device itself, nothing has changed.
For some of you, who needed the MS capsule, your best bet is to either buy it separately, or to search on eBay for an older Grey version of the H6, which had it. By the way, if you click the link just above, to search on eBay, that’s an affiliate link, and I might get a commission from qualifying purchases.
With that in mind, I assume Zoom did the market research, and came to the conclusion that most people don’t care about the MS capsule, thus it being removed.
Versatility
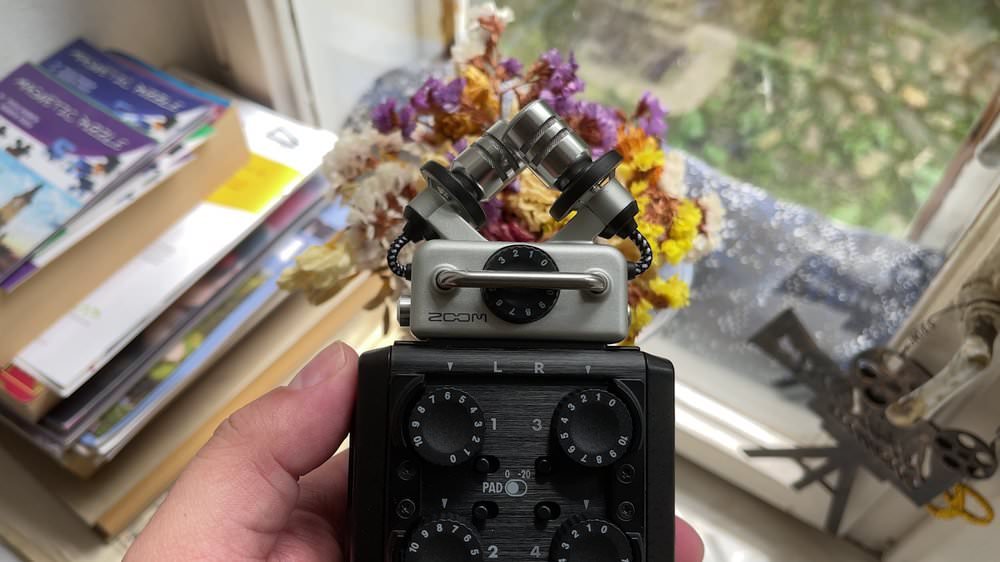
At a close glance, you will notice that the Zoom H6 has a total of four XLR/TRS inputs. These can be expanded to a total of six, if you purchase the separate EXH-6 Combo Input capsule.
Do you find yourself in need of recording location audio? Plug in a boom and a few radio mics into the Zoom H6, and you can get started.
Do you want to record a demo with your band? You can record on the go, wherever you might be. Do you want to record a podcast? You can plug your microphones into this device, and you can monitor each level individually.
By the way, as a quick note, whilst the Zoom H6 can provide Phantom Power to the four built-in inputs, it can not be provided to the Combo capsule. In effect, if you need phantom power on five or six microphones, you might be better off with the Zoom H8 instead.
Zoom has announced that they are working on a replacement for the combo capsule, which will be able to provide phantom power to its mics, but the device is not yet out at the time of this recording.
Free Sound Effects
By the way, did you know I have compiled the largest list of free sound effects in the world? Over 500GB of sounds, ready to be downloaded, free of charge. Just figured you’d want to know. And now, back to the review.
-12dB Backup
I wanted to cover one of the more useful features of this device, and at the same time discuss its limitations.
The Zoom H6 has a feature called a -12dB backup. What it does is when recording, it creates a version of the recording, which is 12dB quieter.
The reason for this is that if you get too loud when recording, and you get distortion, you can go into the -12dB safety track, and replace the distorted clip with the quieter, undistorted version.
This sounds fantastic in theory, but there is an issue. When I first heard about this, my assumption was that this feature could be applied to all six inputs, or at the very least the four built-in ones.
As it turns out, this only applies to the Left and Right channels, so for instance on recordings that you capture with the X/Y capsule. As a result, you can’t do this for a microphone or instrument plugged into any of the four XLR/TRS inputs.
The strange thing about this is that I’ve seen quite a few conflicting opinions online. Some people say that they’ve managed to get backups of XLR microphones, other say that they can’t.
My assumption is that the ones that did get them, used the EXH-6 Combo Input capsule to plug in the XLRs. That might actually work, but that’s a use case that applies to very few people.
This does not affect someone like me, who uses the Zoom H6 in conjuncture with the SGH-6 Shotgun Microphone Capsule, but it would impact someone recording a podcast for example.
I assume this feature is incomplete due to a limitation in processing power. If you know a workaround for this, make sure to leave it down below in the comments.
Setting Levels
Now that we’ve covered safety tracks, I actually want to talk about setting healthy levels, and how to avoid needing a backup track in the first place.
Here is the simplest way I can describe setting levels: Peak as high as you can, without actually clipping.
In practical terms, set your levels so that you don’t really peak above -6dB, try to keep the average around -12dB, with softer sounds hitting around -20dB.
You’ll find a lot of debate online as to how you should set this, but use the numbers I gave you, and play around with your device until you get results that you like.
When in doubt, it’s better to set them too low, than too high. If it’s too high, your recording will be distorted, which will make it unusable.
If it’s too low, you’ll get hiss in your recording, but that’s better than the alternative.
Sample Rate, Bit Depth, and File Type
Let’s talk about sample rates, bit depth, and file types. I’m not only going to run you through which sample rates, bit depths, and file types are supported by the Zoom H6, but I’m also going to tell you which you should use.
First off, you can pick between 16 and 24 bit rate. Go ahead and just stick with 24bit.
In terms of file type, always use .WAV files. This will produce a file rich in audio information, which is always preferable to an .MP3. An .MP3 intentionally excludes some data, which will somewhat degrade the quality of your audio, in the interest of smaller file sizes.
The only instance you’d want to use .MP3 is if you strictly use your Zoom H6 as a dictaphone. If that’s your use case, then go ahead, but most people looking for dictaphones will usually opt for a smaller, and cheaper device.
When it comes to sample rate, you have a few options. I’m not going to go into the science of it, but you can think of sample rate kind of like frames per second in video.
If you’re just filming someone talking, no need to go beyond 30fps. If you want to be able to slow the footage down though, and not get weird artifacts when doing so, you shoot at 60fps or above. Your choice of sample rate when recording audio follows a similar pattern.
Here are the sample rates you’ll have access to, and what they’re usually used for.
44.1kHz
This is typically used for music. There is of course nothing stopping you from recording your music at 48kHz, or 96kHz, but unless you plan on doing some crazy audio manipulation, 44.1kHz will be just fine.
48kHz
This is typically used for audio which will play alongside picture, like dialogue, or a voice over track for a video. It’s a sample rate usually considered more ‘pro’, compared to 44.1kHz, which is seen as something aimed more at ‘consumers’.
96kHz
Use this if you’re going to record ambiences, or sound effects which will be used for sound design purposes.
There is nothing stopping you from using any sample rate, but when it comes to specific use cases, some sample rates are more indicated than others.
Modularity
My favourite aspect of the Zoom H6 is the fact that it’s modular. The device can be used in conjuncture with many capsules, thus allowing you to adapt it to your specific needs.
I’ve purchased all the capsules for review purposes, so let’s go through each, and see what they’re good for.
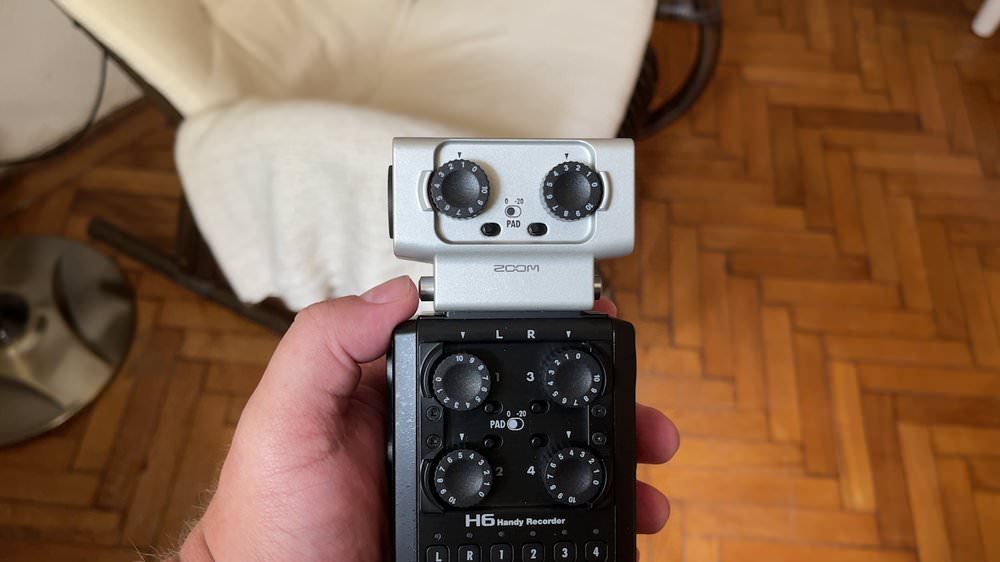
EXH-6 Combo Input Capsule
The capsule allows you to connect two external microphones, instruments, mixers, or portable music players to the Zoom H6. Note that this capsule can not provide Phantom Power to the two inputs, somewhat limiting your options of microphones.
MSH-6 Capsule
This is the capsule that used to come in the box with the older Zoom H6, but no longer does. The MS stands for Mid-Side recording, which is a technique that allows you to adjust the width of the stereo image after the recording has taken place. This can be incredibly useful in post production, as it gives you more flexibility.
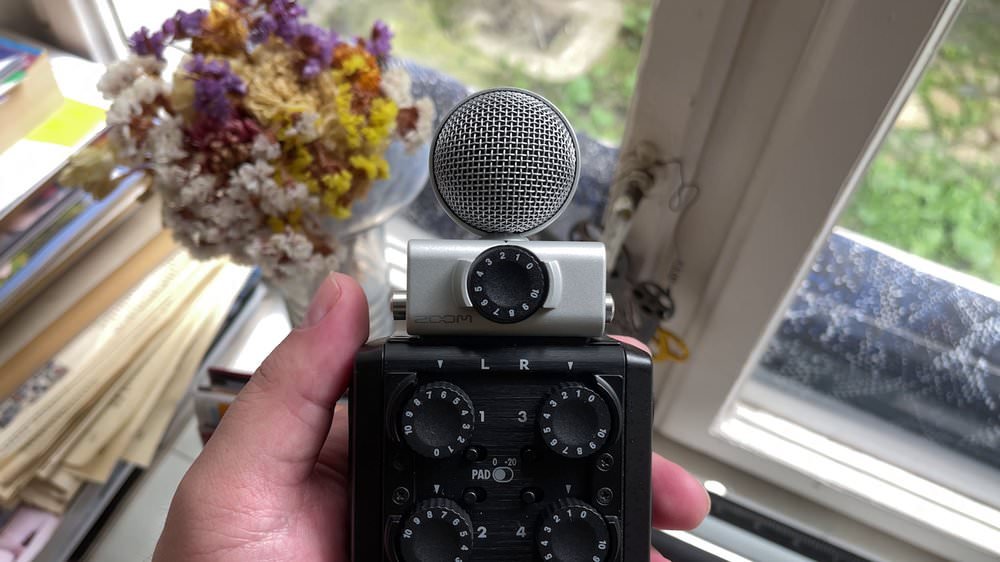
XYH-6 Capsule
This capsule comes by default with the recorder, and adds two matched high-quality unidirectional microphones to your device. The capsule is more sensitive when it comes to signal coming from in front of it, then from the sides, or behind it.
This is mostly used to record natural ambiences, live performances, instruments up close, and some sound effects.
XYH-5 Shock Mount Capsule
This one actually comes by default with the Zoom H5, but you can also buy it separately. It’s similar to the default X/Y capsule that we looked at earlier, but it has built-in shock-mounts.
The purpose of the shock-mount is to minimise vibrations affecting the recording, either from your handling of the recorder, or from the surface the recorder is placed on.
SSH-6 Mid-Side Stereo Shotgun Capsule
This includes a super-directional microphone for picking up sound in the centre, as well as a bidirectional side mic for picking up sounds from the left and the right.
The advantage of this microphone would be that you can record dialogue with the directional mic, and then mix in as much or as little of the environment as you wish, which was captured with the bidirectional side mic. This can be done both in post-production, or directly in the Zoom recorder.
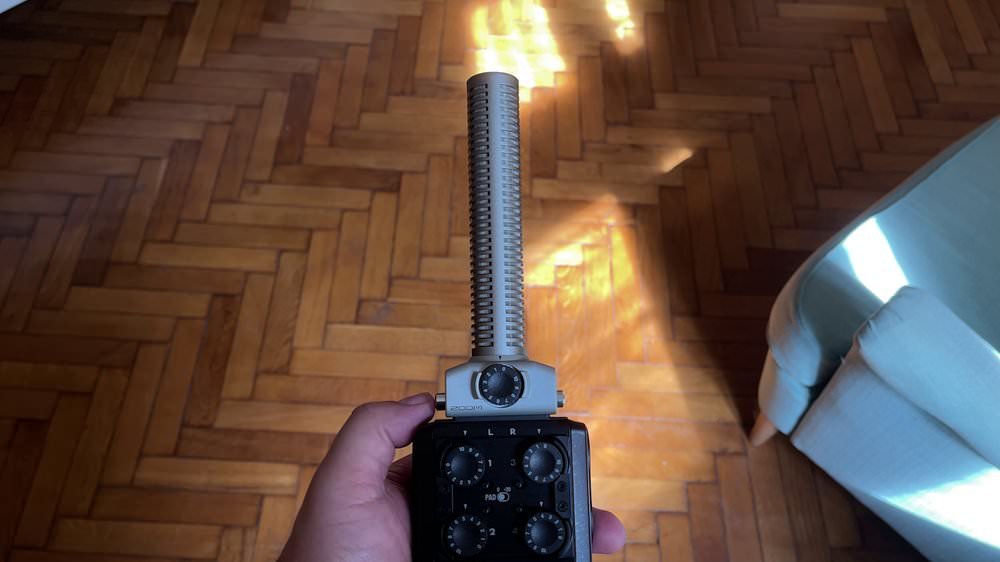
SGH-6 Shotgun Microphone Capsule
Highly directional, it allows you to record focused sound effects, without having to carry a separate microphone and grip with the recorder. Whilst those can be better, they can also be way more expensive, and burdensome to carry. This is a winning combo if you prefer to have a more compact set-up, like myself.
Because of its high directionality, it mostly picks up the sounds in front of it, whilst largely ignoring anything coming from the side, or the back.
By the way, the narration for the video at the top of this article was recorded with a Zoom H6, and this capsule. I use a Manfrotto desk stand in conjuncture with them, and the microphone itself is aimed at my mouth, from the side.
The reason why, is because I like to have the mic quite close to me, and having it on the side prevents plosives.
As a quick side note, one of the benefits of these capsules is that if one stops working, you don’t have to bin the whole unit. Instead, you can just buy a new capsule, and keep using the recording device.
By the way, these capsules work on the Zoom H5, H6, and H8, which means that if you already have the capsules, and you want to upgrade, you don’t need to buy them again for each model. Additionally, Zoom provides you with these plastic tabs, which protect the connection points from dust.
As fantastic as they are, I wish there was some built-in slot in the device where I can keep them when using a capsule. As things stand, I’ve been known to lose the plastic tabs.
Voice Overs
As I’ve mentioned before, I’m currently recording my voice overs with the Zoom H6 and the SGH-6. I switched to this, from my older setup which involved a Shure SM7B, a cloud lifter, and a Zoom H8. The reason is because it’s much more portable, whilst delivering similar quality.
The reason why I chose the SGH-6, over just using the default X/Y capsule that came with it, is because the SGH-6 is far more directional.
As a digital nomad, I travel around, and I can’t always know what the acoustics of a place will be when I’m booking it. As a result, I use a highly directional microphone, which will mostly just focus on my voice, and it will ignore the sound reflections coming from the side, and other unwanted noise coming from the back.
You can use the X/Y capsule that comes with this device, but you’ll be capturing a lot more of the room, instead of a more isolated sound. This can be a good or a bad thing, depending on the situation.
Audio Interface
The H6 can also be used as an audio interface, with your DAW of choice. All you have to do is go into Menu, select USB, and then Audio Interface. The device then gives you the option of either going via the route of a Stereo Mix, or Multi Track.
Once you’ve done that, you’ll have to select either PC/Mac or PC/Mac using battery power. If your computer can’t supply enough power to the device when using Phantom Power, select ‘PC/Mac using battery power’. This will use some of the battery in the H6 in order to provide Phantom Power.
Build Quality
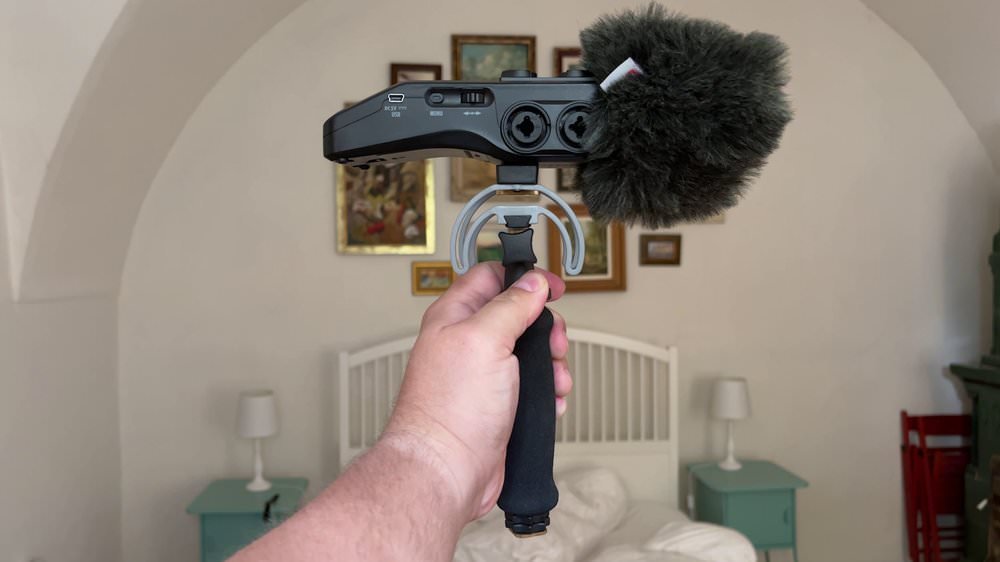
The device itself feels really sturdy in the hand. The rubberised plastic casing also helps diminish handling noise if hand held, though I would wholeheartedly recommend getting this Rycote kit which contains a windshield, shock mount, and grip.
I’ve used it and it really helped eliminate most of my handling noise. When I went on my last recording trip, I could only hear handling noise if I basically shook the whole thing really hard.
Wind and the outdoors
If you’d like to record outdoors with the Zoom H6, you’re going to need some type of wind protection. The default for handheld recorders is usually something like this Rycote windshield.
It fits snugly onto your capsule, and limits the amount of wind that hits the microphones. Additionally, this is much better than something like a foam windshield, which would be completely useless outdoors.
Do bear in mind that these windshields do have limitations. They will stop quite a bit of wind, but if it’s a particularly windy day, or you’re in the middle of a storm, adjusting the placement of the recorder would also be needed (placing your body in-between the wind and the recorder, as an example).
Screen
The screen is obviously tilted, which is great when placed on a DSLR for location recording, or when monitoring whilst recording a podcast. There are situations in which the tilted screen doesn’t help, but they are in the minority.
For example, when I record using this device, and the shotgun capsule, I can’t really see the screen. I usually set my levels, turn it around to record, and I monitor the audio through headphones, to make sure I keep a healthy recording level.
If I could make a suggestion, I would say that I would have loved it to have a swivel screen, so it could be tilted as needed.
As a side note, it’s worth mentioning that some users have said that the screen on their Zoom H6 can have issues after a while. In the case of this YouTuber (Drone CarPark Racing), the edges of his screen have turned white. This is not something that I’ve ever personally experienced, or seen in person, and thankfully it does not seem to be a common problem at all, but it’s worth pointing out.
Great for loud ambiences
Whilst on my last recording trip, I recorded some gorgeous ambiences. The Zoom H6 was actually used to record my Dormant Village audio library.
With that in mind, if your aim is to record super quiet ambiences, the Zoom H6 would not be my first choice. In fact, none of the Zoom handheld recorders would.
Instead, I’d go for The Sony PCM-D100. Even though it can record quiet ambiences with minimal hiss, you do not have XLR inputs.
Now, you can connect microphones to it, via the stereo mini jack input, and you can even jerry-rig it to connect XLRs, but at that point, why not invest in a device that has dedicated XLR inputs.
Given the price of the PCM-D100, which has historically been higher than the Zoom H6, if you really need to connect XLR mics to it, I’d look for other options.
PS: A great potential use for The Sony PCM-D100 would be when recording ASMR, due to its low noise floor.
Here is a sample from a different library of mine, which features quiet natural ambiences, recorded with the Sony PCM-D100.
Guitar Effects
The Zoom H6 does not have built-in guitar effects, like the H4n Pro, or the H8, but it does have a built-in tuner.
This is not something that I’ve ever used, as I prefer to record my electric guitar tracks clean, and then add effects later, but this is something that a lot of guitar players might be interested in.
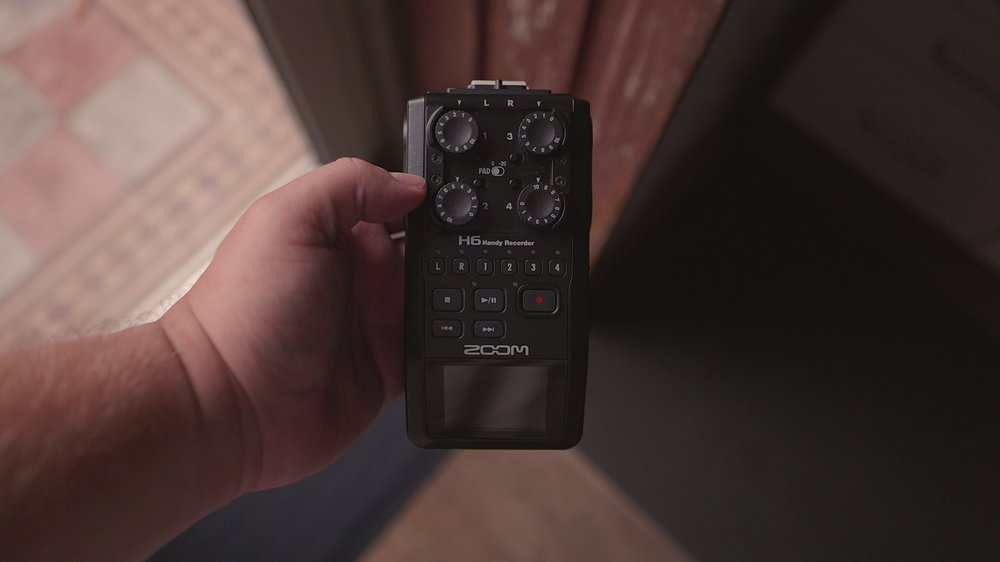
Super portable
The device itself is super portable. The older, Grey edition, used to come in a very sturdy case. With the All Black edition, this is no longer the case (pun not intended).
If you want a soft case for it, you can have a look at the PCH-6 soft case. Alternatively, if you want something really durable, that can carry more than just the recorder, have a look at the SKB case, made specifically for this device.
Within it, you have a spot for the device, the X/Y capsule, MS capsule, shotgun mic, dual input combo capsule, accessories, and a windshield.
Accessories
Speaking of accessories, you can buy the APH-6 accessory pack. The pack includes a windshield, a cable and an adaptor, so you can run the device off the mains, and a wired remote, so you can control it without touching the device.
Affordability
Whilst the prices vary depending on where you are, the Zoom H6 All Black remains a relatively affordable portable recording device.
Battery life
Whilst on a recording trip to Transylvania a few years back, and whilst recording all the time, I only really had to replace the batteries maybe four or five times. Zoom says it can record for up to 20 hours, and depending on the conditions, I’d definitely say that’s true.
I left it to record rain ambiences overnight and 8-9 hours later it was still going strong. When I checked the battery status, it wasn’t even half-way depleted.
You can use an external USB battery to power the recorder as well. This could come in handy if you run out of batteries, as most people are likely to be carrying a USB battery pack with them anyway.
Alternatively, if you get a USB charger, you can connect the device directly to the mains. If you do choose to do this, I’d definitely recommend knowing what you’re doing, as getting the wrong kind of charger might potentially damage your device.
If you want to be safe, you should probably get the APH-6 pack mentioned earlier.
Ease of use
I found the design and menus to be intuitive and easy to use. Swapping capsules is also painless and quick to do.
When under time constraints, this is a massive plus. There’s nothing worse than missing a great recording, because you couldn’t figure out the menus, or because navigating them was a pain.
Audio Quality
The Zoom H6 can record audio up to 24bit/96kHz, which is great if you want to record ambiences or sound effects. If you’re recording a podcast though, or dialogue, there’s no real need to go above 24bit/48kHz.
This is especially the case given the fact that your audience will probably listen to the audio through their phones, or through earbuds.
Conclusion
If you want to record super quiet nature ambiences, the Zoom H6 would not be my first choice. For literally anything else, it’s an amazing, affordable, and portable choice! These have been my thoughts on the Zoom H6, after using it for a few years now.
If you’d like to read some more reviews on the other Zoom handheld devices, or have a look at some direct comparisons, have a look on my website.
Do you have any questions? Feel free to leave a comment down below, and I’ll do my best to get back to you.
Thank you for reading my review of the Zoom H6 All Black Edition. I invite you to have a look at some of my other articles. We have something for everyone, whether you’re interested in audio, or cameras and lenses. Alternatively, if you prefer video reviews, feel free to have a look at my YouTube channel.
Product Links
Down below you will find all of the items I talked about in this article.


Hallo, danke für die ausführlichen Info’s zum Zoom H6! Sind das Netzteil und die Kabelfernbedienung des Hn4 kompatibel?
Danke vorab, Grüße
Comments are closed.