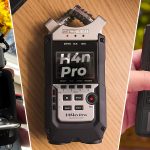
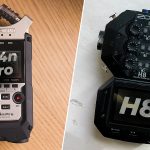
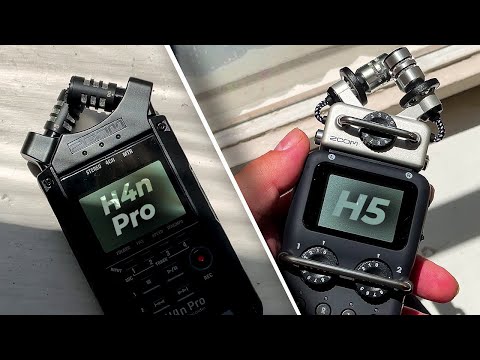
In this review, we’re going to compare two handy recorders, the Zoom H4n Pro, and the Zoom H5. We’ll have a look at what each recorder can do well, what it can’t do, and who should buy it.
Let’s begin.
Inputs
First off, I want to have a look at the number of inputs. Simply put, this is the number of external microphones which you can connect to these devices.
It’s true that some Zoom recorders allow you to use capsules, but those are slightly different, and we’ll go into that a bit later in the review.
So both the H4n Pro and the H5 have 2 x XLR inputs, and a 3.5mm mini-jack input. Simply put, the XLR inputs are for larger microphones, such as shotgun mics, often used for dialogue, or sound effects, or dynamic mics, like the Shure SM7B, which are usually used for podcasting, or voice recordings.
I actually use the Shure SM7B in my current recording setup. I have a link down below if you want to check out my setup in its entirety.
On the H4n Pro, the 3.5mm input is built into the recorder. On the H5, it’s present in the X/Y capsule, but if removed, bear in mind that some of the other capsules do not have a 3.5mm input.
Both the H4n Pro and H5 can provide plug-in power to the lav mics which you might connect to the 3.5mm input. If you have a smartphone lavalier microphone, chances are it has a TRRS plug, which will not work with either recorder. A TRRS to TRS cable adaptor should make it work though.
Now, back to the XLR inputs. If you intend on using the recorder for projects where only two external microphones would suffice, the H4n Pro would do just fine.
If you need to connect more, a bit later in the review, I’m going to cover the capsules which the H5 can use, so stick around to find out.

Battery Life
How well do either of these devices do when it comes to battery life? According to Zoom, the H5 is rated for up to 15 hours, and the H4n Pro is rated for only 6. The H4n Pro is notorious for gobbling batteries, so make sure to pack a few spares.
Bear in mind that the battery life of the device can be affected by a myriad of factors, from the brand and type of battery, to the air temperature, and of course, whether or not you have other microphones connected to it.
The Zoom H5 has an accessory pack called the Zoom APH-5, which contains a power adaptor and cable, a windshield, and a few other things. This would allow you to keep the recorder plugged in, if needed.
Size & Build
When it comes to build quality, they’re both quite nice, though I personally prefer the build of the H5. Be aware that there is a known issue where the rubberised coating on some Zoom recorders can become sticky over the years.
There are ways to fix this once, or if it arises, but bear in mind this is an issue inherent with such coatings, not with Zoom recorders specifically.
I’m not going to give you any examples of what you could do to fix the problem, as there is always a small risk you could damage your recorder, so you’ll have to do your own research on this one.
In terms of size, the H4n Pro measures 73 x 157.2 x 37mm, or 2.87 x 6.19 x 1.46 inches, and weighs in at around 294g, 10.37 oz. On the other hand, the H5 measures around 197.3 x 66.8 x 42.16mm, or 7.77 x 2.63 x 1.66 inches, and weighs in at around 269 grams, or 9.52 oz.
Display
In terms of display, both the H4n Pro and the H5 have a backlit display. This is great when you’re trying to figure out what you’re doing in low-light conditions.
I’d say that the quality of the display doesn’t really matter that much in audio recorders. As long as you can see what you’re doing, that’s more than good enough.
I’d love to see articulated screens on these types of devices, as you see on cameras, but I don’t think any audio recording device will come with that feature any time soon, unfortunately.
Versatility
Next up, let’s talk about versatility. Which recorder is useful in the highest number of meaningful scenarios?
This one needs to go hands down to the H5. The reason is the fact that the H5 can use interchangeable capsules. Let’s talk a bit more about those, actually.
Capsules
Now, while the Zoom H4n Pro can not use any capsules, as its microphones are built-in, the Zoom H5 can swap them as easily as changing a lens on a camera. Let’s have a look at the capsules, and talk about what they can each do.
EXH-6 Combo Input Capsule
The EXH-6 allows you to actually connect two more XLR microphones to your recorder, increasing the total number of inputs of the Zoom H5 from two, to four.
This is fantastic if you don’t want to use the Zoom H5 as a field recorder, and instead just want to connect a few more mics to it.
The EXH-6 does have a limitation that you should be aware of though, which is that it can not provide Phantom Power to the microphones connected to it, in contrast with the built-in XLR inputs, which can do that.
XYH-6 Capsule
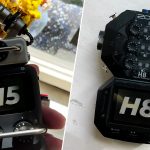
The XYH-6 is the capsule which comes by default with the Zoom H6 and Zoom H8. It adds two matched unidirectional microphones to your handheld recorder. This capsule is most sensitive to sounds coming from directly in front, and it is less sensitive to sounds coming from behind, or the sides.
This capsule is great for general recording, ambiences, sound effects, and more. It’s basically the default capsule, which is good at most things.
If you’re getting the Zoom H5, I’d actually recommend you stick with the default one you get, and I’ll explain why right now.
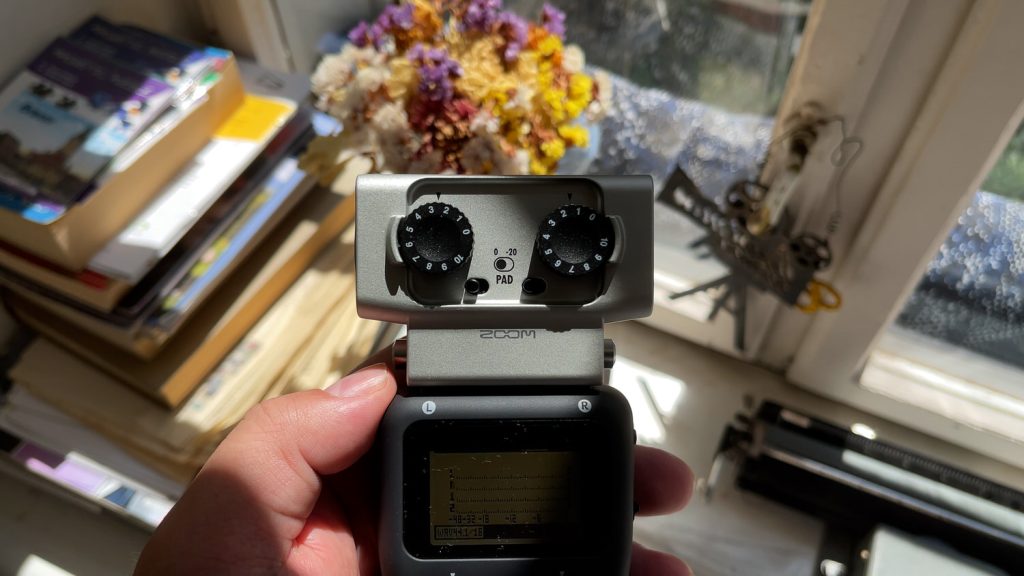
XYH-5 Shock Mount Capsule
As you can tell from the name, the XYH-5 capsule, which comes by default with the Zoom H5, has a built-in shock mount. This serves to minimise vibration and handling noise, when holding the recorder in your hand.
I don’t know why the XYH-6 capsule doesn’t have a built-in shock mount as well.
MSH-6 Capsule
Next up, the MSH-6 capsule, which is probably one of the more obscure ones. The MS stands for Mid-Side, which means that after you’ve recorded your tracks, you can adjust the width of the stereo image in post-production.
This is really useful for a range of applications, from recording instruments, to ambiences.
SSH-6 Mid-Side Stereo Shotgun Microphone Capsule
Even though the MSH-6 capsule is strange, this one probably takes the cake, as far as capsules compatible with the Zoom H5 go. There are even weirder capsules, but we’ll address those in a bit.
So the SSH-6 capsule contains a super-directional microphone, which is designed to really focus on sounds coming from the centre, as well as a bidirectional side microphone, for picking up sounds left and right of it.
The more obvious use for this microphone is with dialogue, where you can use it to capture it on set, and then in post-production, you can decide how much ambient sound you want to mix in.
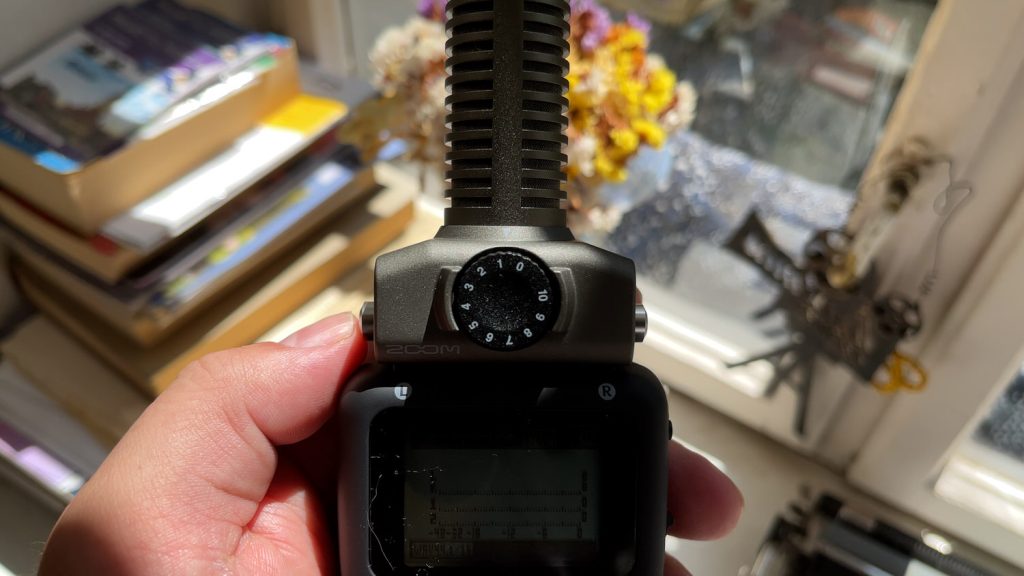
SGH-6 Shotgun Microphone Capsule
Next up, we’re looking at the SGH-6 capsule. Instead of capturing a stereo image, this super-directional mic captures a mono signal. It’s really good at focusing on one thing, and recording it well, whilst mostly ignoring sounds coming from the back, or the sides.
I’ve actually used this capsule many times to record audio for this channel in the past. Once we finish talking about capsules, I’ll tell you a bit more about how I did that, and more importantly, why.
More capsules
Now, there are actually 3 more capsules that I want to introduce you to. These three are only compatible with the Zoom H8, but I believe it’s important to know what options you have available to you. The third one might actually wow you.
XAH-8 Capsule
So the XAH-8 capsule is similar to the XYH-6, but it’s an XY/AB combination mic. With this capsule, you can either record using a wide AB pattern, or with a tight XY pattern. This gives you more options in the field.
VRH-8 Capsule
The second H8-only capsule is the VRH-8, which is an Ambisonic mic capsule. It uses four condenser microphones, and it delivers 360 audio recordings.
In addition to that, it has a built-in accelerometer, which makes sure that the capsule is always perfectly aligned. Also, the onboard Ambisonic decoder handles any conversions that might be necessary, and that saves you time in post-production.
EXH-8 Capsule
Finally, the third capsule, called the EXH-8. This one I think is the most impressive, as it is a massively upgraded version of the EXH-6.
This capsule not only gives you four extra inputs, on top of the Zoom H8’s six built-in inputs, but as long as you’re willing to connect it to a power source, it can also deliver Phantom Power to the extra mics!
Now, if you do that, the setup obviously becomes a bit less portable, but the most popular use for this capsule would be in a podcast scenario, where you wouldn’t be moving the recorder anyway.
Voice Overs
So now that we’ve covered all the capsules that the Zoom H5 can use, I want to go into a bit more detail about how I used to record my voiceovers for my YouTube channel with the Zoom SGH-6.
So I travelled for a while, and I needed a setup that was both mobile, and effective. I ended up carrying a Zoom H6 with me, with the SGH-6 capsule.
When I had to record, I’d place the recorder on a small desk stand, I’d point the mic at my mouth, and I’d record.
Because I was travelling, and staying in different locations all the time, it was difficult to assess the acoustic properties of a room, or apartment, before renting it. Not only that, but it’s difficult to know how noisy the traffic is at different times of the day, how loud your neighbours, or their pets are, etc.
As a result, I needed a mic that would focus on my voice, and generally try to block out anything else around me. That’s why I picked the SGH-6.
This would have worked just as easily with the H5, but I happened to have the H6 at the time, and that’s what I went with.
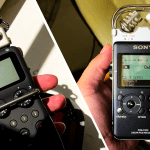
By the way, I’ve reviewed more Zoom recorders on my YouTube channel, as well as the Sony PCM-D100. I’ll also review Tascam recorders in the near future.
-12dB Backup
Next up, I want to talk about a really useful feature which the H5 has, but unfortunately, the H4n Pro does not have, and that is the -12dB Backup feature.
What it does, is when you’re recording, it creates a backup track, precisely -12dB quieter.
The reason why you might want this, is in case your recording clips, and thus a portion of the track, or the whole recording, becomes unusable as a result.
Now, this feature sounds fantastic, and it is, but unfortunately, it has a flaw. When I first heard about it, I had assumed that this would apply to any capsule, or external mic that I plug in. Unfortunately, it only seems to apply to the Left and Right channels, when you record with the X/Y capsule.
You can’t do this for any instrument or microphone plugged into the XLR/TRS inputs.
The strange thing is that I’ve seen a lot of conflicting opinions online about this. Some people claim that they’ve managed to get backups of XLR microphones, while others say that they can’t.
If you know how to get it to work with external mics, leave a comment.
Setting Levels
Regardless of whether you have access to a backup function or not, it’s important to know how to set levels, so that the backup function becomes something that is only needed in the case of absolute disaster.
In general, you want to set your gain so that the loudest sound you’re likely to make, or record, peaks just before 0dB. If you do this, you won’t clip, and you also won’t be recording at a low level, which would introduce unwanted hiss into your recordings.
In the real world, you want to leave yourself a little bit of headroom, so with louder sounds, you want to peak around -6dB, with normal sounds you want to sit at around -12dB, and quieter sounds should probably hit around -20dB or so.
The number that you set is entirely up to you, as different sound sources require different amounts of headroom. If you expect that you’ll be shouting during the recording, or you’ll record loud sounds, such as explosions, you’ll want to leave yourself enough headroom, so that the recordings don’t end up being unusable.
This will take a bit of practice to get just right, but it’s worth playing around with the settings, until you find something you like.
Sample Rate, Bit Depth, and File Type
Before we delve into sample rates, bit depth, and file types, let’s briefly discuss each, so that you understand what they mean. Once you get a better understanding of what they are, I’ll explain what each is used for, so that you can figure out if either recording device will be enough for you.
First off, when it comes to sample rate, you can pick between 16 and 24-bit. Given the large SD cards we can buy today, just stick with the 24-bit rate with your recordings. No real reason to go down to 16-bit.
In terms of file type, you should just use .WAV. Using .MP3 might feel convenient, and it will take up a lot less space, but .MP3 is compressed, and you’ll lose a lot of audio information.
When recording in the .WAV format, your recorder will produce files that are rich with audio information, and that’s always preferable to an .MP3.
The only instance where you’d want to use .MP3 is if you’re using the Zoom H4n Pro or H5 as a dictaphone, which I wouldn’t think anyone would do anymore, given that we all have smartphones. Plus, there are smaller handheld recorders which can serve as dictaphones.
When it comes to sample rate, you have a few options to choose from. Without going into the science of it, you can think of sample rate almost like frames per second in a video.
If you’re filming an interview, 24fps or 30fps would do just fine, whereas if you want to slow footage down, and not get glitchy artefacts when doing so, you shoot at 60fps or above.
Your choice of sample rate when recording audio should follow a similar logic. Here are the sample rates you’ll have access to, and what they’re usually used for.
44.1kHz
This sample rate is usually used for recording music. You can of course record music at 48kHz, or 96kHz, and sometimes that’s what you want to do, but generally, most music is recorded at 44.1kHz.
I’ll explain in a little bit why you’d want to record music at 96kHz.
48kHz
This sample rate is usually used for audio which will play alongside video, like dialogue, or a voice-over track for a video. The sample rate of 48kHz is often considered more ‘pro’, compared to 44.1kHz, which is often seen as something aimed more at ‘consumers’.
96kHz
This sample rate is reserved for more specialised uses, such as recording ambiences, or sound effects which will be stretched and heavily processed.
Recording at a higher sample rate allows you to stretch and process sounds to a higher degree, which is why it’s used for sound effects. You can, of course, also record music at this sample rate, if you wish to do some heavy stretching and manipulation.
Audio Interface
Can you use the Zoom H4n Pro, or the Zoom H5 as an audio interface? The answer is yes. All you have to do is go into Menu, select USB, and then Audio Interface.
Free Sound Effects
By the way, did you know I have compiled the largest list of free sound effects in the world? Over 500GB of sounds, ready to be downloaded, free of charge. Just figured you’d want to know. And now, back to the review.
Sound Quality
Next up, what about sound quality? The Zoom H4n Pro and the H5 use the same preamps, which means that they basically sound the same. They are suitable to record voice, music, concerts, instruments, sound effects, and basically anything that you could think of.
One area in which they do not excel though, is super quiet ambiences. Every recording device produces some amount of hiss, as a byproduct of how their components work.
When increasing the gain on your recorder, you’re also going to bring up the hiss. If you record with a low gain, and then increase the volume in post, you’ll still bring up the hiss.
What normally happens, is that when you record louder sounds, you get a good sound-to-noise ratio. In other words, the desired sounds are loud enough that they make the hiss inaudible in comparison.
With quiet ambiences, you get a poor ratio, and thus the hiss is audible. The only real alternative is the Sony PCM-D100, which I’ve also reviewed on this website.
The issue with the PCM-D100 is that due to it being difficult to source at the moment, the price has gone up dramatically. I have an affiliate link down below, if you want to check how much it currently costs in your country.
Some people say it is discontinued, others say that it’s being produced in far fewer numbers, and others still say that its manufacture is on pause due to a lack of available components.
Nobody seems to know for sure right now, but what is clear is that this recorder will cost you a pretty penny.
Wind Protection
In the process of recording outdoors, you’ll often find yourself dealing with wind noise. This can occur if you’re a field recordist, if you’re recording an interview outside, or recording an outdoor music performance.
If your recorder comes with a little foam windshield, know that it’ll basically be useless. You’re better off investing in a proper windshield.
I usually recommend this kit from Rycote, which not only offers you a quality windshield, but also a grip and a shock mount, which allow you to hold the recorder in your hand, without getting handling noise in your recordings.
Bear in mind that really strong wind can be tricky, and there is a limit to how much a furry windshield can actually do.
Portability
What about portability? Both of these devices are highly portable, as you can easily drop them in a backpack, and head out to record.
If I’d have to choose one for portability, I’d pick the Zoom H4n, as it’s a bit smaller than the H5, and it’s one unit. The H5 can obviously use different capsules, some of which significantly elongate the device. This makes the device more useful, but at the same time, less portable.
So, when it comes to portability, the H4n Pro wins out.
Guitar Effects
Does either of these recorders offer guitar effects? Surprisingly, the H4n Pro does. Both recorders also have a built-in tuner.
This is not something that I’ve personally ever used, as I like to record clean guitar tracks, and then add effects in post, but I know that this feature is something a lot of guitarists might like.
Affordability
What about affordability? Which recorder is cheaper? While prices can fluctuate, the H4n Pro is usually a little bit cheaper than the H5. Price isn’t the only metric you should keep in mind when making a decision, but it is one nonetheless.
Ease of use
What about ease of use? How difficult are these recording devices to use?
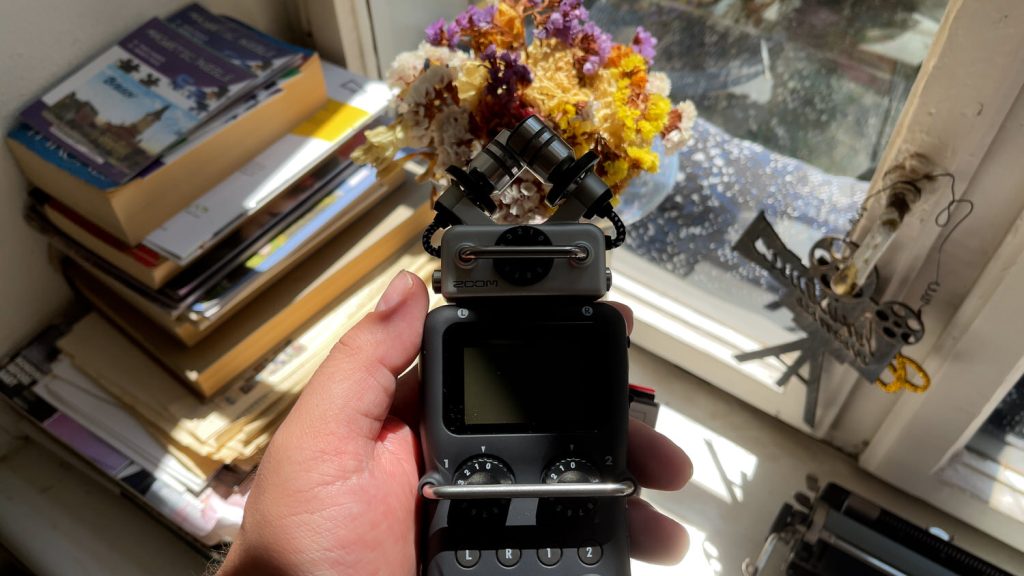
I’ve found that both have very intuitive menus and such, which is a great plus. When it comes to physicality, I’d say that the H5 is easier to use than the H4n Pro, as the H5 has manual gain knobs, whilst the H4n Pro gain is controlled incrementally with a side button.
The H5 also has a metal bar over the gain knobs, which prevents you from accidentally changing any settings during operation.
Storage
So when I was doing research for my H4n Pro review initially, I came across a fascinating discovery. The H4n Pro actually has built-in memory.
Well, kind of. There is a feature where you can record up to 35 seconds of audio, which you can then transfer to an SD card later.
This is aimed at people who want to record a quick memo, but don’t have an SD card inside of the device at the time.
This feature was clearly designed before everyone had a smartphone, but still, an interesting feature nonetheless.
Now, in terms of actual storage, both devices take SD cards, up to 32 GB in size. Even if you’re recording at 96kHz, that’s a lot of space for your recordings.
If you’re recording a stereo track at 24bit/48kHz, 32GB should, in theory, allow you to record about 2000 minutes, or 33 hours. Neither of the recorders can last that long on battery power, so if you wanted to do this, you’d have to be plugged in.
When it comes to SD cards, I do need to point out an issue with the Zoom H4n Pro, and that is that the larger the SD card’s capacity is, the longer it takes to turn on.
With a 32GB card, it can take up to a minute for the H4n Pro to boot up. That being said, formatting the SD card inside of the H4n Pro, as opposed to doing it on your computer, does seem to cut down on the start-up time significantly. This is not an issue with the Zoom H5.
If you want to avoid this, use smaller SD cards when possible, and format them internally.
Conclusion
And now, the conclusion. Which one should you buy?
Congrats on still being here by the way, as this is probably one of my longest reviews to date. If you’ve made it this far, comment ‘still here’ down below.
So, let’s break this down quickly. If you want a recorder that is more compact, and able to record on the go, but you don’t need the Zoom capsules, and you don’t want to connect more than 2 other mics, go for the H4n Pro.
If you need all those things, go for the H5. In fact, given that the H5 isn’t really that much more expensive than the H4n Pro, I’d actually just go ahead and grab that one.
Maybe you don’t need to use capsules in the future, but if you do, you’ll be ready for them.
If the number of inputs provided by either of these recorders isn’t enough though, I’ve also reviewed the Zoom H6, and H8 on my YouTube channel.
If you’d like to purchase any of the items I’ve mentioned in this article, or see how much they cost in your country, I have a link down below where you can view them.
Thank you for reading my comparison review of the Zoom H5 vs H4n Pro. I invite you to have a look at some of my other articles. We have something for everyone, whether you’re interested in audio, or cameras and lenses. Alternatively, if you prefer video reviews, feel free to have a look at my YouTube channel.
Product Links
Down below you will find all of the items I talked about in this article.